
5 FAQs about Exterior Window Shutters
Like front doors, window shutters can provide an excellent opportunity for owners to add a splash of color or visual interest to their home’s exterior. However, before adding new shutters or replacing your current ones, you may be considering these common questions.
1. Do window shutters have a functional purpose, or are they primarily decorative?
The answer has evolved over the centuries. Historically, shutters are considerably older than windows. Glass was rare and expensive initially, so shutters were the primary way of letting light and air into rooms and providing privacy and security.
Also, since homes’ exterior walls used to be much thicker, shutters were initially mounted on the interior walls. Some included operable, louvered slats. This type of internal shutter later evolved into what is commonly called plantation blinds.
Later, homeowners began mounting shutters on exterior walls. During Colonial times, external shutters were often functional and used for light control, privacy, protection from the elements, and security.
Today, most homes’ window shutters are decorative, although they can play a vital role in protecting your home during severe storms. Depending on your budget and style, you might prefer to go shutterless or add them to your street-facing windows (only) for curb appeal.
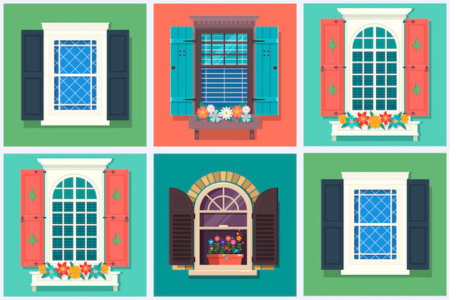
2. What are the most common types of exterior shutters?
When shopping for window shutters today, you’ll likely encounter decorative versions of these classic styles:
Solid panel shutters, used initially used for insulating properties, were more common in colder climates. Panel-style shutters can be flat boards or include raised or recessed panels.
Louvered shutters have rows of fixed or operable slats that can open or close to control light and airflow.
Board and batten shutters have several vertical boards held together by shorter horizontal pieces. Sometimes, the bracing boards include an angled section resembling the letter Z.
Bahamas shutters, also called Bermuda shutters, are similar to louvered shutters, except they are mounted above the window instead of on the sides.
3. What are the best exterior shutter materials?
Traditionally, wood has been the most commonly used shutter material, primarily made from cedar, redwood, and mahogany. Wood shutters can be customized with stain or paint to match any style or color scheme.
Vinyl is a more economical option, although the range of styles and colors is more limited, and they are only decorative. Also, vinyl shutters exposed to direct sunlight may fade and develop a dull, chalky film, often making it harder to keep them looking like new.
You can also find shutters made of various composite materials designed to look like natural wood while resisting water, mold, and termites. Composites are more durable than wood shutters and can be painted, but you can’t stain them.
4. What common mistakes should I avoid when installing shutters?
If you’re adding decorative shutters to your home and want them to appear realistic, avoid three frequent mistakes:
- Don’t select shutters that are taller than your windows. Ideally, they should match the outer dimensions of your window frames.
- Don’t install shutters alongside wide window openings (e.g., a picture window or a series of side-by-side windows). Remember, the best decorative shutters appear functional. So, a tiny shutter on a wide window will look useless and out of balance.
- Don’t use rectangular shutters on arched windows. Again, the shutter should match the shape of the window.
Check out The Old House Guy for many more tips on installing functional shutters and making decorative shutters appear as historically accurate as possible.
5. Can I make my shutters?
Since the price tag on manufactured wood or composite shutters can be substantial, especially if you need multiple pairs, many homeowners opt for budget-friendly vinyl shutters.
However, it’s relatively easy to make your own board-and-batten style wood shutters—a significant upgrade over vinyl—that can be accomplished at a comparable cost.
You can find numerous how-to videos on YouTube and elsewhere with additional details on these steps:
- Purchase western red cedar boards. Typically, this type of lumber is cut to be rough on one side and smooth on the other three sides. The rough side is “displayed,” facing away from the house.
- Cross-cut the boards to your desired lengths. Depending on the size of your windows and the width of your wood, you’ll want three or four vertical pieces for each shutter and two or three cross-pieces.
- Stain or prime-and-paint the wood pieces, depending on which finish you desire.
- Assemble each shutter, butting the vertical pieces together or adding small spaces between each board.
- Hang each shutter using finishing screws or hinges and tie-back hardware for a more authentic historical appearance.