How to Prep Your Room Before Painting It
Paint is one of the best ways to transform a room’s appearance quickly. Once you’ve selected a color, it’s tempting to take shortcuts and see immediate results.
However, before you start applying paint, it’s essential to prepare your walls and workspace. Thorough preparation is probably the least enjoyable part of the job, but it makes a significant difference in your final results.
Here’s how to do it:
Step 1. Remove the Extras
Move as much furniture as possible out of the room. Position any remaining pieces in the middle, so they're out of your way and easy to cover with drop cloths.
Instead of painting around them, remove switch plates and outlet covers. Likewise, remove any wall sconces or other fixtures attached to the walls, including artwork.
If you don’t plan to rehang artwork in the same spots, remove the nails or hangers. Spackle these spots and use sandpaper to smooth the surface after it dries.
Also, remove any drapes, blinds, and curtain rods. Consider temporarily removing the mounting hardware, too, instead of masking it.
Step 2. Protect Surfaces
Drape drop cloths over any remaining furniture to protect it from paint and dust while you work.
Spread drop cloths across the floor, securing them to the corners and along edges to ensure no paint accidentally finds a path to the floor.
Taking time to protect these surfaces will save more time than fixing an “oops” after the fact.
Use painter’s tape to protect trim around windows and doors, including any baseboards or crown molding running along the bottom or top of your walls. This will help protect these surfaces from accidental paint smudges and improve your paint job’s sharp edges.
Step 3. Clean the Walls
If your walls are new and have never been painted, you’ll only need to wipe down the surfaces with a slightly damp rag or a tack cloth. This will ensure any dust or construction debris is removed before painting.
Painted walls should be cleaned more thoroughly, especially in the kitchen and adjacent spaces where cooking oil and grime drifts onto the walls. Give the surface plenty of time to dry before moving onto the next step.
Step 4. Apply Primer?
Primer is an undercoat that seals the surface and makes it easier for paint to adhere to it. Over the years, paints have improved to the point that you might be able to skip this step and go straight to a color coat.
But there are several instances when a coat of primer is still essential:
Porous surfaces – New drywall, for example, will absorb moisture from paint unless you apply a coat of primer first.
Glossy surfaces – It’s difficult for paint to adhere to high gloss surfaces. For the best results, gently sand the walls, clean them again, and apply a primer coat.
Stained surfaces – Primer effectively seals and blocks stains like smoke residue or old water damage that would otherwise leach through your paint.
Foul odors – Primer can also seal off offensive aromas, including stubborn cooking smells, strong pet odors, or the stench of cigarette smoke.
Dark surfaces – If your new paint color is dramatically lighter, a primer will prevent the old, highly saturated color from seeping through lighter pigments. Plus, it’s easier to apply a single primer coat than four or five coats of paint.
Step 5: Paint!
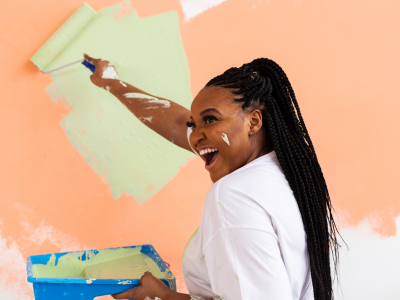
Cut in the edges first with a brush. Then switch to a roller, taking care to keep the edges wet to avoid roller marks.
Wait for the paint to dry before applying any additional coats. If your project is large and you need to take overnight breaks, wash your brushes, rollers, and paint trays at the end of each painting session.
Another option is to tightly wrap your brush and roller in plastic wrap and place them in a freezer. Just be sure to give them time to thaw completely before removing the wrap and using them.
When all the painting chores are complete, thoroughly clean your tools. Before sealing and storing any remaining paint, wipe out the can’s edges, so it doesn’t “glue” shut. You can even add a layer of plastic wrap in between the can and the lid to make it easier for the next time you want to use it!
Step 6. Final Touches
Once the paint has dried completely, gently remove the tape used for masking and fold and store any reusable drop cloths.
Store any extra paint in a cool, dry area (at or above 50 degrees Fahrenheit), so its condition doesn’t degrade, and you can use it for future touch-ups.
It takes time to prepare walls for painting properly, especially when you’re anxious to see the results. But the time spent preparing a room will improve the end product and your satisfaction with the work you’ve done.
