
How to Check Your Home for Air Leaks
Homes should be airtight. When they aren’t, comfort is compromised, and budgets are busted. After all, heating and cooling represent more than half of all energy used in U.S. homes.
The cost of leaks adds up. According to the U.S. Department of Energy, the average American wastes $200 to $400 in home energy costs each year due to drafts, air leaks around openings, and outdated heating and cooling systems.
So, how can you find the spots where air is escaping or entering your home? There are two ways to tackle this challenge.
Option 1: Do It Yourself
Sometimes, the source of an air leak is obvious. More often, you’ll need to rely on tools to pinpoint problems. There are various options, depending on your budget.
Select your tools
One of the simplest ways to detect drafts is with a flame, using a candle. However, a flame will only tell you if the air is moving. To pinpoint the direction and source of airflow, try using a burning stick of incense or a smoke pen.
A no-contact infrared thermometer can also be helpful. For example, with an infrared gun, you can measure the surface temperature along a wall and detect cold (or hot) spots that could indicate a leak.
Professional inspectors rely on expensive thermal cameras, but new imaging devices that integrate into smartphones are a more affordable option. For examples that integrate with iOS and Android devices, see FLIR ONE, Seek Thermal, and others.
Also, grab some sticky notes or a roll of painter’s tape to mark any spots you find, so it’s easy to go back and fix them after completing your inspection.
When to inspect for air leaks?
Since a home’s framing materials expand and contract during hot or cold weather, it’s best to check your home for leaks in the winter and again in the summer.
Ideally, pick a windy day when indoor versus outdoor temperatures are significantly different. That way, it should be easier to detect air leaks.
Inspection list
To evaluate all possible sources of air leaks, focus on these areas:
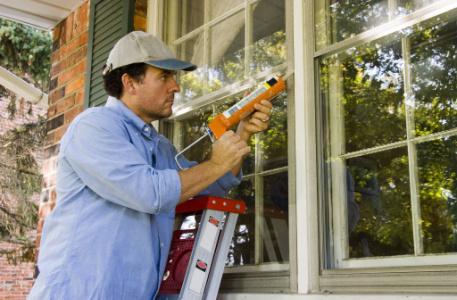
- Windows - Inspect all along the edges between the glass, the frame, and where the frame meets the wall. Gaps, cracks, and insufficient insulation can allow air to escape.
- Exterior doors - Check all four edges where a closed door meets its frame, paying particular attention to the threshold, which often has a more significant gap.
- Outlets and switches - The cover plate on electrical boxes makes them look fully integrated into your walls, but each switch or outlet represents a “hole”—and possibly a gap in your insulation. When checking for air leaks, concentrate on the electrical boxes on your exterior walls.
- Lighting - Fixtures mounted on your exterior walls or in a ceiling are also holes, similar to switches and outlets, making them another common source of air leaks. Also, recessed can lights often leak hot air into attics, especially if they use heat-producing incandescent bulbs.
- Air ducts - Since HVAC systems move heated or cooled air throughout your home, checking them for interior leaks is essential. Look for any loose connections or gaps in ductwork seams that can cause heated or cooled air to be released into your basement or attic before it reaches your rooms.
- Fireplace - If you have a fireplace, ensure it’s sealed completely when not used.
- Attic - Look for gaps in your insulation and spots where holes have been cut for wires or plumbing, leaving an unsealed opening.
Option 2: Hire a Pro
Consider hiring a professional energy inspector if you want a more comprehensive analysis of your home’s air leaks and overall energy performance.
Most inspectors use high-resolution thermal imaging equipment. They can also attach a sealed blower to your front door, which draws the air inside your home outside and encourages outside air to enter your home through any openings.
A blower door makes it easier to spot air leaks with a thermal imaging camera or a smoke pen.
Home energy assessments can cost several hundred dollars, depending on the size of your home and the complexity of the tests performed. But many homeowners find that a test pays for itself within a few years, especially if they find and correct significant problems.
To locate a qualified professional in your area, try consulting the Building Performance Institute or the Residential Energy Services Network (RESNET).