
A Beginner’s Guide to Growing Houseplants
When winter doldrums are at their worst and gray skies prevail, you may decide it’s the perfect time to add indoor plants to your home. Houseplants are a welcome reminder of the greener days of summer. They’re available in various sizes, shades, and textures, and many houseplants are easy to grow.
But what if you’re new to growing plants indoors? Be sure to take these steps to help ensure your success!
Step 1. Choose the Best Plants
As a new indoor gardener, you’ll want to select undemanding plants with low maintenance requirements. (Avoid that finicky fern you’ll have to mist daily!) Evaluate the amount of sunlight your plants will receive, and select plants with light preferences that are well suited to your growing space.
For example, some plants prefer bright, direct light (perfect for a south-facing window), while others thrive in the indirect light of a large north-facing window. Numerous plants do well in the “in-between” light of your home’s east- or west-facing windows.
Consider rotating your plants so they grow evenly on all sides! Also, if you have cats or dogs in your home, check the ASPCA’s list of toxic and non-toxic plants to select species that won’t harm your pets. Likewise, it’s essential to keep children away from from toxic plants, indoors and out.
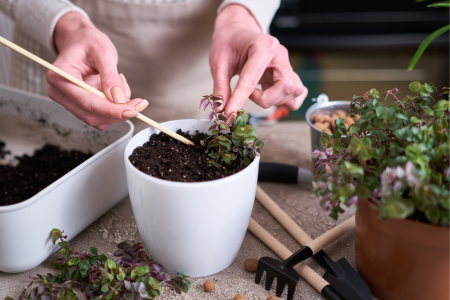
Step 2. Be Selective About Soil and Pots
Most houseplants are sold in small plastic containers and should be transplanted into a larger pot. Choose one 1-3 inches wider than the plant’s root ball. You can plant directly into a decorative pot or keep your plant in a thin, plastic container slipped into a larger, decorative vessel.
Regardless, consider a plant’s watering requirements when selecting its pot. Most plants dislike sitting in soggy soil, so drainage holes are essential. (If your container has no drain hole, consider using it with a plastic pot liner.) Also, remember that unglazed terra cotta pots won’t hold water as long as glazed or plastic pots.
Choose a standard potting mix that drains well, retains some moisture, and doesn’t become waterlogged. It’s better to purchase a quality mix that includes fertilizing nutrients instead of digging up soil from your garden.
Step 3: Protect Furniture and Floor Surfaces
Don’t spoil your initial indoor gardening experiences by ignoring the risks of water damage! The safest way to water your plants is to temporarily move them to your sink. But if that’s not possible or practical, place trays or other shallow containers under your pots to capture draining water.
You’ll also want to add protective cushioning since pots filled with heavy soil and water can scratch tabletops, shelves, and flooring. Consider elevating any enormous pots a couple of inches off the floor with a short, rolling plant stand.
Step 4. Establish a Watering Routine
Plants have different watering preferences. Some like to be saturated from the top down, while others prefer soaking water from the bottom up.
Many houseplants enjoy moderate watering every week, but there are exceptions. Succulents, for example, prefer infrequent but deep drenching, while tropical plants may need more consistent moisture.
Develop a watering routine based on the specific needs of your plants and monitor their behavior. For example, wilted leaves may be a sign of over-watering.
Step 5. Prune and Trim Regularly
Most houseplants will grow and look better if you remove any yellowed or damaged leaves. Trimming back any leggy stems can also encourage bushier growth. In addition to keeping your collection attractive and growing well, you might be able to propagate stem clippings into new plants!
Getting Help
If a plant is not thriving, don't get discouraged. Instead, investigate potential issues. Online resources, plant forums, and local gardening communities can be valuable information sources. Share your experiences and learn from others, and soon, you'll find yourself confidently caring for a thriving collection of indoor greenery.