
Hang a Picture in 5 Foolproof Steps
Decorating your walls is an excellent way to add color and flair to your home and give your rooms a finished and welcoming appearance. Plus, artwork provides a unique opportunity to personalize your space with images that you love.
Hanging your prints, paintings, photos, and other items doesn’t have to be a hassle. If your home’s interior walls are comprised of drywall (most are), there are many easy options.
Follow these steps for art hanging success!
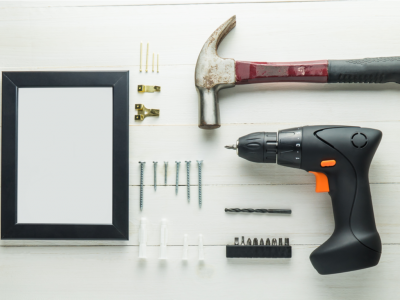
Step 1. Select Your Hardware
The correct hardware depends on the size and weight of your art and its positioning on your wall. If you’re able to nail directly into a wood stud behind the drywall, a nail angled into the stud will be strong enough to hold even heavy pictures in place.
Lightweight Items
A small nail hammered into drywall will support your lightest items but isn’t as stable as anchor wires, such as Monkey Hooks, that push through the plasterboard and provide additional support from behind the wall.
Other options, like Command hooks, Velcro-style hangers, and double-sided tape, won’t create a hole in your wall and may work if the art is light enough. Be aware that some of these methods may damage the paint on your walls, even if they don’t create holes.
Heavier Art and Mirrors
If you can’t rely on a stud for heavier items, you may need to add wall anchors to secure your pieces. Plastic anchors are used with screws instead of nails and require drilling a hole in the wall to hold the anchor.
Toggle bolts that expand behind the wall are another type of anchor that distributes weight and adds strength.
Step 2. Gather Your Tools
You will need the following tools:
- Measuring tape
- Pencil
- Painter’s tape
- Level
- Hammer
If you’re using wall anchors, you’ll also need:
- Drill
- Screwdriver
Step 3. Measure
For the best results, position your pictures at eye level, roughly 60 inches above the floor. Use painter’s tape and a pencil to mark your vertical center point while also adjusting right or left to center the piece on the wall.
Now, measure the distance between the middle and top of your picture and mark this spot on your wall.
If you’re hanging a grouping of items, position the middle piece at eye level. It may be easier to trace and cut out the frame sizes on paper and tape them to the wall.
Step 4. Install the Hardware
The placement of your hook depends on how your picture attaches to the wall. If your art has a hanging wire or sawtooth hooks, you only need one measurement—from the top of the frame to the point where the hook will hold it in place. Measure and mark the same distance on the wall, directly below the spot indicating the top edge of your frame.
If your frame has two hangers, one on each side, you’ll need to make sure both anchors are level and properly placed.
An easy trick is to put a dab of toothpaste on the hangers on the back of your picture and place it against the wall, using a level to make sure the frame is in the correct position. The toothpaste spots will indicate where to place your anchors. And it’s easy to wipe any toothpaste residue off your wall.
Step 5. Finishing Touches
Once your hardware is in place, remove any painter’s tape, wipe away any drywall dust, and get ready to hang your artwork.
To discourage your pictures from slipping and becoming crooked, apply rubber “feet” on the back of your frame at the lower corners. This will also help protect the paint on your walls from scuff marks.
Now, hang your art and enjoy it!